So you’ve just bought your first drum set, and right now you just might be staring at the pile of pieces in bewilderment, unsure as to how it all goes together. In this article, I’m going to show you the basics of setting up a drum set, and explain why we do it the way we do.
Components (and variations)
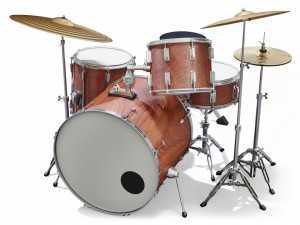
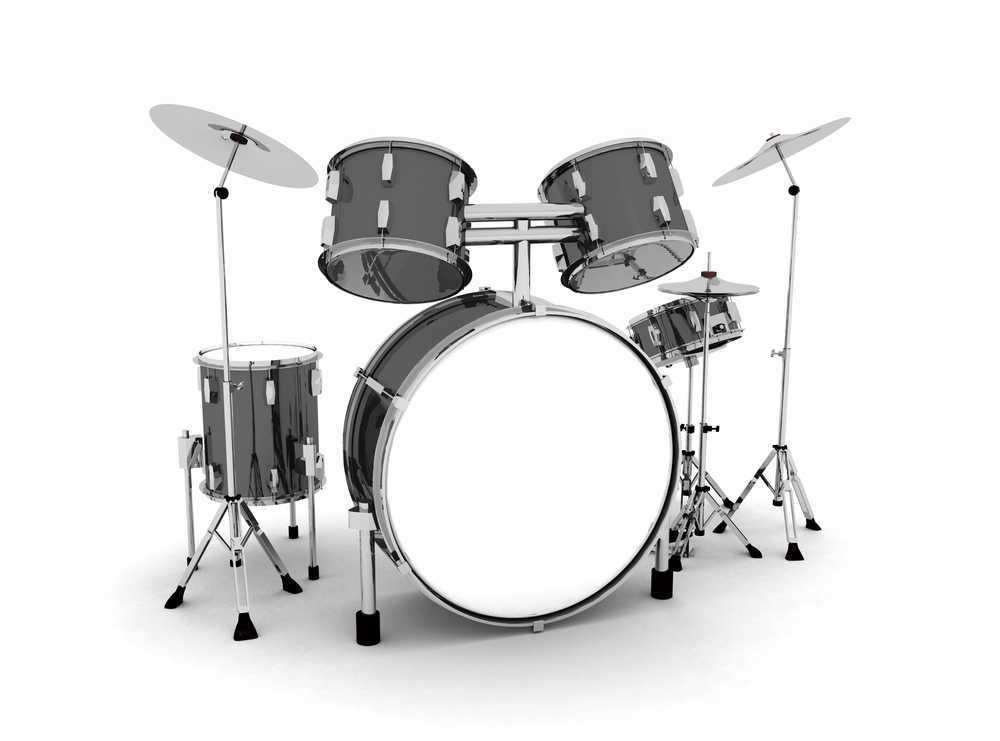
At its most basic, a typical drum set consists of:
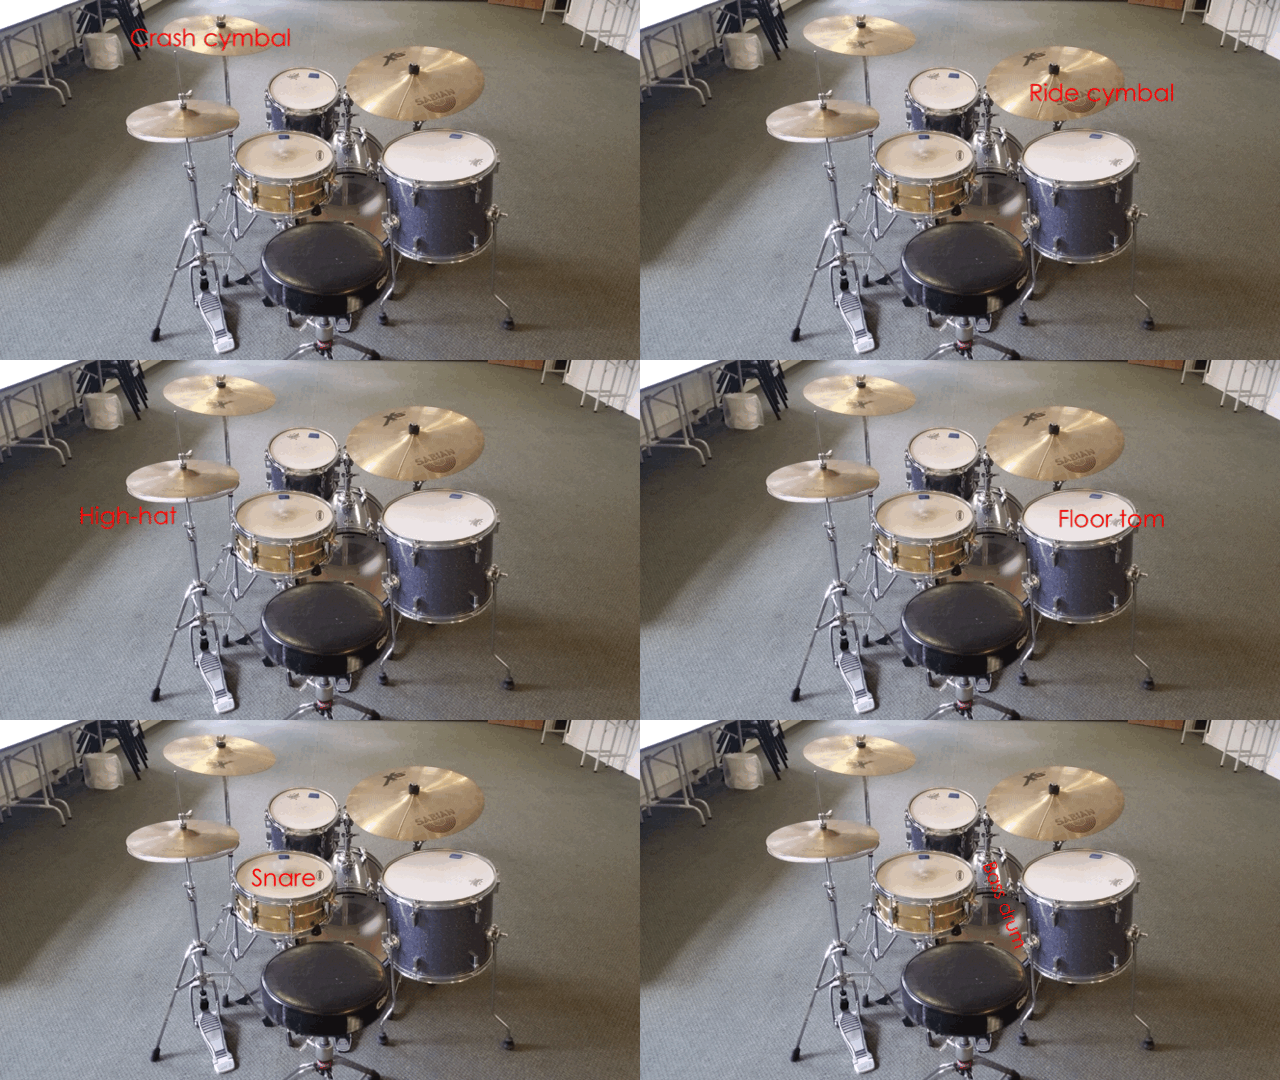
1. Snare drum
This drum typically has a shallower shell than the other drums you have received, and is so named for the system of wires that run along its bottom head (the ‘snares’ or ‘snare wires’)
2. Bass Drum
This is the largest, lowest pitch drum that sits on the floor and is played with a foot pedal.
3. Tom toms (rack and floor)
These are deeper shelled drums, in a variety of sizes; there are usually two or three (including the floor tom, which stands on three legs), but there may be more- though I do not recommend more for the beginner!
4. Cymbals
You should have at minimum, one ride cymbal, a crash cymbal, and a pair of high-hat cymbals (which are mounted in such a way as to be played with the foot as well as the sticks).
5. Hardware
This includes the high-hat stand, stands for the cymbals, any mounting hardware for the toms, and the bass drum foot pedal.
This illustration shows the standard arrangement for a basic set:
Most left-handed drummers prefer to reverse this setup, but some do not! Ringo Starr is a classic example of the latter, while Phil Collins is an example of the former.
[su_box title=”A few basics to consider when following this model:” box_color=”#168ee6″ title_color=”#fefefe” radius=”0″ class=”width: 200px;height: 400px;”]Your snare should sit between your thighs and knees, with your throne positioned so that both arms (relaxed) are equidistant from the center of the snare head. Your feet should land in a relaxed, natural way on each pedal, with no angling of feet or legs being necessary. Snare and floor tom should be at the same height, and most people these days recommend they be positioned flat (with heads parallel to the floor) or minimally angled. A good rule of thumb for all the drums played with sticks is to ensure that you are able to play a rim-shot (stick striking the head and the rim simultaneously) with both hands (and don’t worry if you can’t do that yet, just put both sticks on each drum, touching the head and rim- if you cannot do so comfortably, you’ll need to make some adjustments).[/su_box]
Principles of setting up a drum set properly
Assuming we are going to adhere to convention as far as basic setup goes, there are a couple of considerations regarding optimal setup. We want your drum set to be optimized for:
1. Comfort and conservation of energy
2. Total control of, and access to, the full palette of sounds the drum set offers
3. Minimization of risk
Thankfully, most of the things we will talk about just happen to do all three at once! We’ll begin with:
At what angle should my drums and cymbals be?
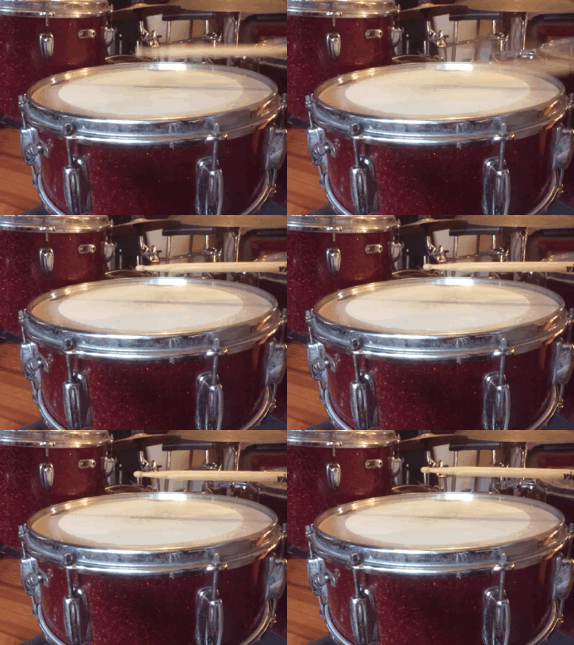
Aside from the bass drum (the angle of which is inherently fixed), this is a very important consideration, and one which all too frequently is not addressed early enough. It is very common for the beginning drummer to have her toms- and even her snare- angled sharply towards her (with the batter head essentially facing her). This approach is problematic on many levels, and in fact violates all three of the aforementioned principles. When a drum is struck with the stick, generally speaking, it is the side of the bead of the stick that should be making contact with the drum head, as in this illustration:
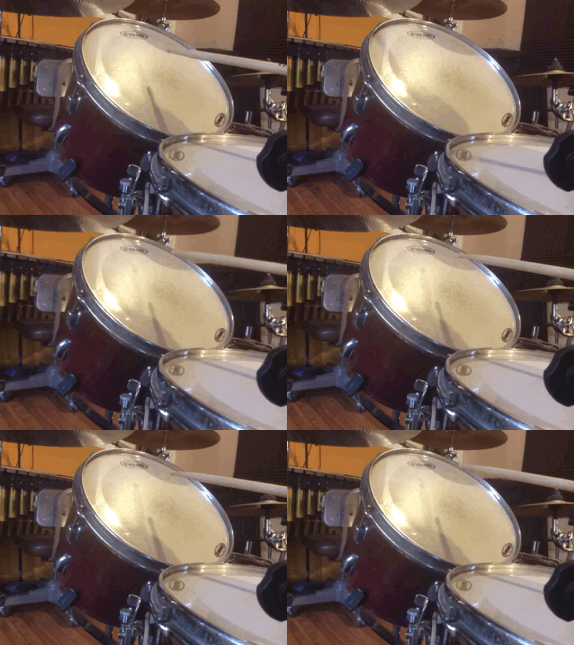
If a drum is too steeply angled, it will result in the tip of the bead striking the drum, as shown here:
This is likely to lead to poor tone production, an increase in risk of damage to the drum head (as seen in the pitted heads of so many beginning students), and potentially, excessive strain on the wrist. Furthermore, rim-shots are impossible on such a steeply angled drum.
Toms that are positioned too high result in wasted energy and potential strain. Correcting this is pretty simple- just place them within the easiest reach that doesn’t result in steep angles, and where they do not come into physical contact with other elements of the drum set (which obviously would result in unwanted noise and wear).
Similarly, cymbals should be easily accessible- not too high (remember, conserve your energy- drummers need all they can get)- and additionally, should be angled for access to the wealth of different sounds each cymbal can produce. A steeply angled cymbal will drastically reduce that palette. The drummer should have access to every area of the cymbal with both the bead and the shoulder of the stick.
Further considerations when setting up a drum set- make sure the wingnuts are not too tight- cymbals should be free to move on their rods (you’ll need to check for other parts of the set obstructing this, and adjust carefully). Clamping your cymbals down too tightly chokes the sound that they produce. Also, make sure to head down to your local music store and get a handful of plastic cymbal sleeves- these slip over the threaded rods that cymbals rest on, and prevent the hole of the cymbal from rubbing against the rod, or worse, the threads! This will save a lot of cymbal life, and improve the sounds they produce.
So in short, when setting up a drum set, ensure that you have easy and comfortable access to every element!
Hardware and other elements
Each of your cymbal stands has an adjustable tripod base (there are some exceptions, but it’s more than likely this is what you’ve got). The key to setting these at the optimal base width depends on a couple variables, and depending on your particular setup, some trial and error will be necessary. Fundamentally, each base should be set as wide as possible given space limitations (the reason for this I hope is obvious). Smaller base widths are fine for lighter cymbals, and the widest you can manage for heavier, larger cymbals, or very heavy-hitting drummers (relax cowboy, they have microphones at the club)! Adjusting the high-hat stand can take some getting used to, but the main concern is having the foot pedal flat on the floor.
And finally, the throne. Opinions vary on throne height- some like to sit high, some low- so I’ll give my opinion based on my experience. I believe that the optimal height allows your knees to be directly over your ankles when placed on the pedals, with your thighs more or less parallel to the floor. This allows you to center your gravity on the throne, resulting in all your limbs being free to move independently. From this point, you may need to readjust your snare and floor tom heights based on the aforementioned rim-shot principle.
Hope this has helped you in setting up your drum set; here’s wishing you happy and safe drumming!








you have described a perfect way about a drum set setting process. i have got more necessary information from here. thank you very much for this best idea