There are few instruments friendlier to complete beginners than the piano. On most other instruments, it takes new students weeks or even months to learn how to produce single notes, but generating noise on the piano is remarkably intuitive. Press one key down softly and you’ll get a soft sound. Press a key down firmly and quickly and you’ll get a louder sound. Press multiple notes down simultaneously and you’ll get some sort of chord. Anyone can get sounds to come out of a piano, but converting those sounds into music takes work. If you’re dying to learn how to play the piano but have no clue how to get started, then you’ve come to the right place. This is a special Musika piano tutorial for complete beginners. We’ll give you everything you need to help you master basic skills on the piano.

What you’ll need
To get the most out of this piano tutorial here’s what you’ll need:
– A piano, electric keyboard or synthesizer. Any basic instrument with a keyboard will work. If you’re learning on a regular old piano, it’s super important that your instrument is tuned. You can tell if your piano is tuned or not by playing every note from left to right and listening for notes that sound out of place.
-A metronome. This is a device that produces audible rhythm patterns you can practice to. There’s tons of free or cheap metronome app options you can download straight to your phone, or your local music store will have plenty of options.
-A pencil and paper to take down notes.
A gateway to music theory
Before you tackle basic concepts on the piano, it’s very important that you put what you’re learning into a music theory context. Why? The piano’s keyboard is essentially a perfect visual representation of what happens in music theory. Learning a few simple formulas and patterns will help you to be able to build scales and chords not just on the piano, but on every instrument in music. New students to other instruments have a much harder time understanding their instrument in a music theory context, but us pianists have it easy because our instrument is laid out in a straight line, key by key. To help you get the most out of this piano tutorial, we’re going to show you how to master some piano basics while teaching you theory at the same time.
Middle C, steps and note names on the piano
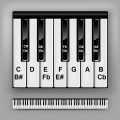
Many traditional pianos have 88-key keyboards, but you’ll stick to playing just one octave (an octave is a set of eight white keys). The first thing we’ll show you is where middle C is located on the keyboard. From this spot, you’ll learn every note name on the piano:

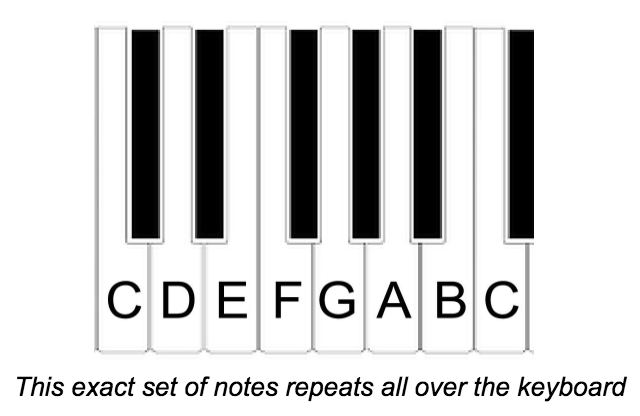
The piano’s keyboard is built off of repeating sets of white and black keys. The distance between one note (this includes white and black keys) and another one directly above it is called a half-step. Two half-steps are called whole-steps. Starting from middle C, the white keys follow the alphabet note-by-note until they reach G where they’ll reset to an A on the next note.
The piano’s black keys are called accidentals. The accidental above middle C is called both C# or Db (sharps are a half-step above a key and flats are placed a half-step below) depending on the context of whatever you’re playing. Yes, that sounds totally complicated, but I promise it’s for a very good reason that we don’t have time to get into in this piano tutorial. In short, every accidental can be both flats and sharps.
Here’s a visual guide to help you learn the notes names on the keyboard:
Proper fingering
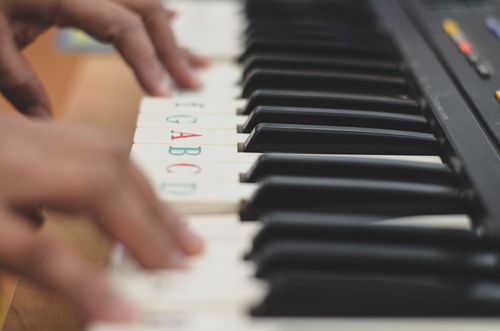
Most scales, exercises and notated music written for the piano comes with detailed instructions for how to play with your fingers. Fingers on both your left and right hand are numbered like this:
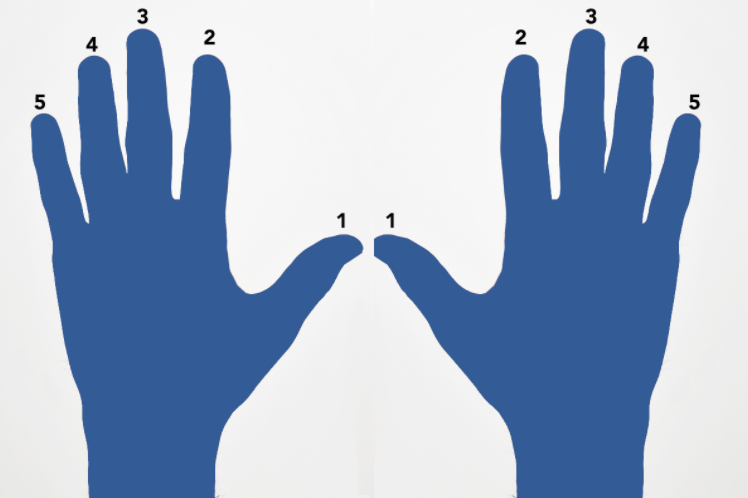
Playing with proper fingering is an an essential element of good piano technique. At first it might be difficult to play with the correct fingering, but down the road you’ll find it nearly impossible to play the piano without the proper fingering. Don’t try to learn or play anything on the piano without using the correct fingers.
Introductory exercise
This exercise is a great way to introduce rhythm, note names, proper fingering and the correct way to hold your hands while playing the piano. Let’s start with your right hand. With your thumb (#1), find middle C on the keyboard. Your hand should be relaxed with your palm facing down to the keyboard. Position your hand so that each finger rests above each key. When you’re ready, play C, D, E, F and G with your 1, 2, 3, 4 and 5 fingers. Then without pausing play that same sequence of notes backwards. If you need help memorizing note names, try saying the name of each note as you play it.
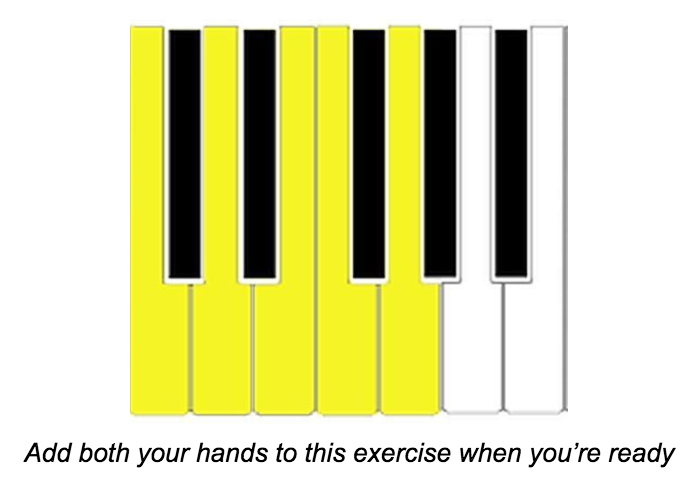
Once you’ve completed that sequence, move your hand and thumb to the D above middle C and repeat the same sequence there and on every note until your hand reaches the C an octave above middle C. When you’re ready, add in your left hand and try playing the exercise with your hands together. You’ll play the C an octave below middle C with your left hand’s pinky (#5 finger). As soon as you get your bearings, start practicing this exercise to the slow click of a metronome (start around 70 beats per-minute). Every seemingly inconsequential thing you play on the piano should be an opportunity for you to develop your rhythm-playing skills, so have your metronome out and clicking while you master this exercise.
C major scale
Learning scales is a great way to develop independence between your left and right hands. In music theory, a scale is simply a series of notes that explore a key or tonality through a step-by-step sequence of notes. The different notes in major and minor scales can be arranged in a way that builds the basic chords we hear in music. We’ll discuss more about chords in a bit.
The C major scales’ fingering pattern can be applied to lots of other piano scales, so this is a great place to start connecting your hands with scales. We recommend learning the scales with your hands together instead of separately even, but feel free to split your hands up if you need to. In this scale, you’ll play exclusively the white notes on the keyboard. When you’re ready, practice this scale with a metronome.
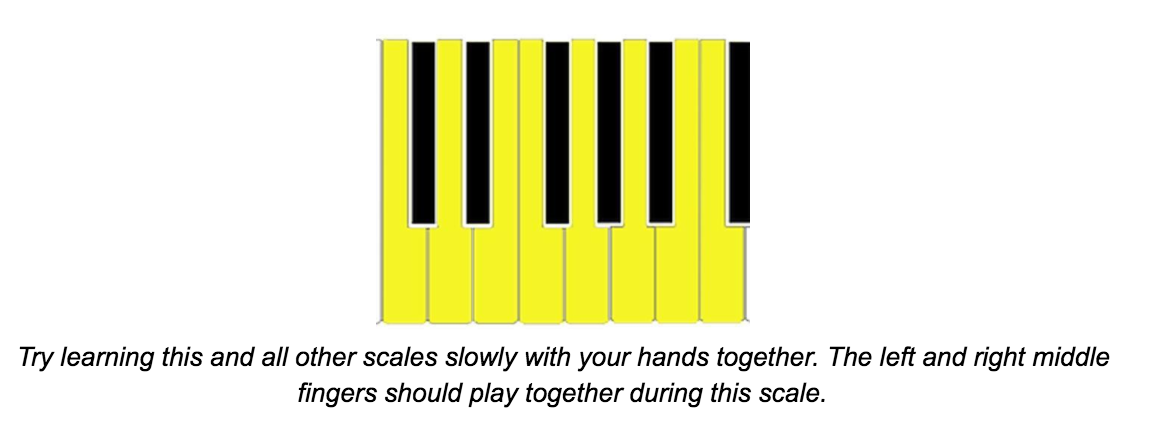
Here’s the note names and fingers for the C major scale:
C-D-E-F-G-A-B-C
RH: 1, 2, 3, 1, 2, 3, 4, 5
LH: 5, 4, 3, 2, 1, 3, 2, 1
With this fingering, your middle fingers will always play at the same time. If they don’t, start the scale over again. When you’re ready, start practicing this scale to a metronome.
A natural minor scale
There are three minor scales in music: natural, melodic and harmonic. For the purposes of this piano tutorial, we’re just going to show you how to play natural scales. The A natural minor scale has the same fingering pattern as the C major scale. You’ll basically do everything you did on the C major scale only starting on the note of A.
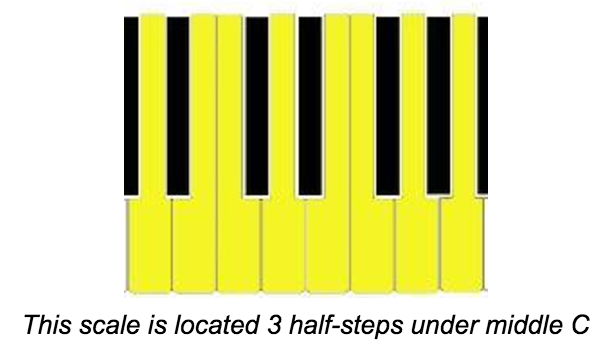
This scale shares all of its notes with the C major scale because it’s a parallel minor the key of C. Parallel minor keys and scales are located three half-steps below their major counterparts. For example, G major’s parallel minor key is E minor.
The fingering pattern used in the C major and A minor scales can be applied to these other scales:
G major
G minor
D major
D minor
A major
A minor
E major
E minor
Start by memorizing these scales before you move on to learning ones with more complicated fingerings.
Building major and minor scales
All major and natural minor scales can be built on the piano and in all of music by using one simple pattern of whole and half steps:
W-W-H-W-W-W-H
To use this pattern, start again with the middle C note. Skip a whole step and you’ll get D. Skip another one and you’ll get E. From there, move up just a half-step and you’ll get F. Skip three more individual whole-steps to get G, A and B and one more half-step to get back to C. Practice building major scales by trying this pattern out on different keys around the piano.
To build all natural minor scales, you’ll use this pattern:
W-H-W-W-H-W-W
Remember, these formulas construct major and minor scales not just on the piano but in all of music. Singers, guitarists and tuba players all use these same sequences of notes to build scales, but pianists have a much easier time visualising and understanding scales because the keyboard is laid out in such a linear way.

Basic chord exercise
Once you’ve got a good idea of how scales work, you can apply some simple formulas to every major and minor key on the piano. There are three different types of basic chords in music: major, minor and diminished. Major chords sound full and complete. Minor chords sound sad, morose and pensive. Diminished chords sound tense, dramatic and unsettling.
Different combinations of individual notes create the basic chords we hear in music. Most the music you hear is built off of different chord progressions.
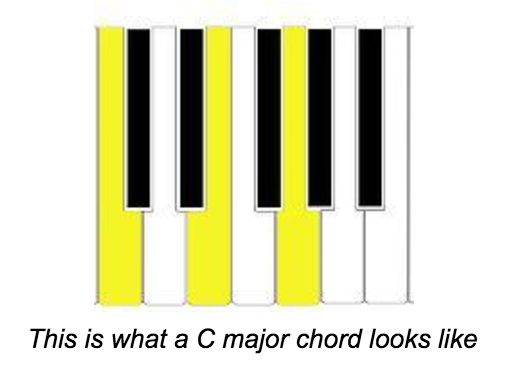
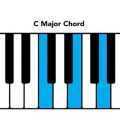
To start, press your right hand thumb, middle finger and pinky down (1, 3, 5) on the middle C, E and G notes to play a C major chord. Maintaining the same fingers and hand shape, build a chord on every key in the C major scale until you get back to a C note located an octave above where you started on middle C. Add in your left hand when you’re ready and use the pinky, middle and thumb fingers (5, 3, 1). If you’ve gone through every note in the C major scale correctly, you should have played the following chords: C major, D minor, E minor, F major, G major, A minor, B diminished.
All major keys will have this same exact sequence of major, minor and diminished chords:
- Major 2. Minor 3. Minor 4. Major 5. Major 6. Minor 7. Diminished
Once you’ve mastered this exercise in the key of C with a metronome, try it out in different keys around the piano. Playing the same chord progression in multiple keys will help you to practice your chord-playing and develop your music theory knowledge at the same time.
This basic chord exercise can also be played in natural minor keys, but the order of chords will be different. If you try this exercise in the key of A minor, you’ll get the following sequence of chords: A minor, B diminished, C major, D minor, E minor, F major and G major.
All natural minor keys have the same sequence of basic chords:
- Minor 2. Diminished 3. Major 4. Minor 5. Minor 6. Major 7. Major
If you apply everything you’ve learned in this piano tutorial so far, you’ll now be able to play every basic chord and many major and minor scales on your instrument.
Hanon exercises
Once you’ve mastered playing scales and basic chords on the piano, we recommend picking up a book of Hanon piano finger exercises. These exercises are designed to deliver strength, flexibility and dexterity to your hands. You can pick up a copy of this book online or at your local music store.
Where to go from here
 We’ve barely scratched the surface as far as what’s possible on the piano, but the basic skills we’ve introduced here are more than enough to start you on your journey. What we’ve covered here is especially beneficial to people wanting to write or perform popular music, but pianists wanting to learn how to read sheet music should pick up a book of easy piano songs and apply what they’ve learned from this tutorial there. For help mastering the concepts we’ve covered in this piano tutorial, we recommend working with an experienced and patient teacher in your area. For more articles about the world of music, check out what we’ve got posted on the Musika Lessons blog.


