Sadly, mastering strumming patterns is a skill that doesn’t get much respect in the guitar world. When most people think of playing the guitar, they conjure up scenes of someone playing virtuosic solos shrouded by thick layers of fog from atop a huge stage in front of thousands of adoring fans. Even insanely-easy to learn and play power chords get more love than strumming patterns. But as it turns out, strumming patterns are one of the most important guitar skills to have. This goes for rhythm and lead players. Rhythm reading and understanding how to read strumming patterns can be very challenging for musicians new to playing the guitar, but don’t fret! We’re going to walk you through it with some helpful tips and exercises.
Alternate Picking
 Before we talk about how to read strumming patterns or rhythmic notation, we absolutely have to talk alternate picking. Alternate picking is when you alternate between picking up and down. When you play a warmup or scale, you naturally begin by picking straight down, but many beginning guitar students pick back up while returning to the down position again. Not alternatively picking isn’t just bad technique, it’s a waste of energy. The faster you employ a smart alternative picking technique the faster you’ll be able to master guitar strumming pattern basics.
Here’s a simple warmup to try out alternate picking: play the 6th open string of your guitar picking down. Then, hold down the 1st fret with your left hand index finger and pick upwards. Pick back down while moving your left hand middle finger to the 2nd fret. Pick back up while holding down your left hand ring finger on the 3rd fret. On the 4th fret, pick the string down again. Repeat the same thing on every open string until you get to the 1st string 4th fret. Once you get to the 4th fret of the first string, do everything exactly backwards until you get back to where you started on the open 6th string. Throughout this warmup and any scale you play, never pick one direction more than once.
Music Notation
A lot of young, eager guitar students look forward to reading music notation as much as they look forward to a trip to the dentist, but I’m here to tell you that dotted eighth notes and ties are not out to get you. Music notation is not some lofty, intellectual code used by only serious classical composers. It’s the language that musicians of all styles and backgrounds use to speak to each other. Composers and songwriters actually want nothing more than for the musicians who play their pieces to fully understand and perform their music accurately, so chances are that the average sheet music you’ve come across has been thoroughly written and arranged in a way that makes it as easy to understand as possible.
Breaking It All Down
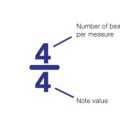
 Let’s talk about the basics of what you’ll see when you read the rhythm in a song. The first thing you should pay attention to is the time signature. The time signature is the two numbers you’ll see at the left side of the piece of music. You might run into something that looks like 4/4 or some other combination of numbers. To make things easy, we’re going to use 4/4 or “Four – Four” as an example. The top number in a time signature represents how many beats there are in each measure of a piece. Measures are the boxes you see in a piece of music, and they’re separated by bar lines. The bottom number of a time signature represents the value of a note. In our 4/4 example, the bottom four is a quarter, as in quarter note. So, 4/4 means four quarter notes per measure. 12/8 would mean twelve eighth notes per measure. The time signature strictly tells you what sort of rhythm the piece should be played in, not how fast or slow the piece should be played. For instructions on tempo, there is usually some sort of written instruction at the top of a piece. If you’re learning a pop song, you’ll have to try and match the speed of the song by ear.
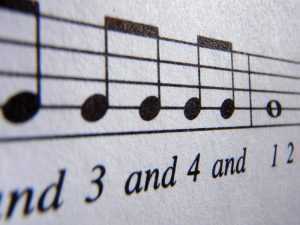
Now that we know what time signatures are, let’s talk about how to read notes. Quarter notes represent the sound of one beat in a measure, and they look like this: ♩ If you see four quarter notes in a measure, it would be counted out like 1, 2, 3, 4. Eighth notes are counted out as 1-and-2-and-3-and-4-and, and they are played directly on and between beats. Eighth notes look like this: ♫ There are many other notes and symbols involved in music notation, but for now we’ll just focus on quarter notes, eighth notes, and a few other simple symbols.
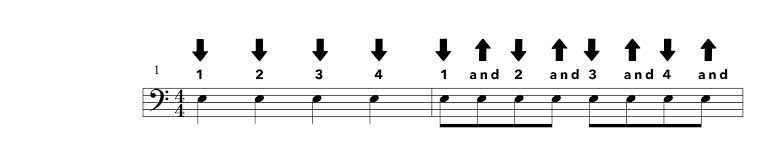
The way you use alternate picking to play scales and warmups will be similar to the way you think about how to read strumming patterns. Unless the song calls for a distinct driving beat, you’ll alternate between up and down while strumming simple eighth notes. To practice, play one measure of four quarter notes and then a measure of eight eighth notes. Try not to pause in the middle. Feel free to practice with any chord you like:
Once you’re comfortable with how to read strumming patterns above, we’ll introduce a few other music notation symbols you’re likely to see in music notation. Ties are symbols that connect one note to another. A note tying to another note sustains throughout the duration of the second note. Here’s what a tie connecting two quarter notes looks like: 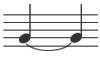 Ties can cross over bar lines, and they add syncopation into strumming patterns.
Rests are symbols that tell musicians to be completely silent during a specified section of music. A quarter note rest is a symbol that represents the rest of a full beat and it looks like this: 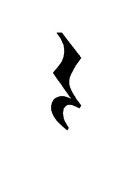
An eighth note rest is a symbol that represents the resting of an eighth note. It looks like this: 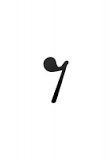
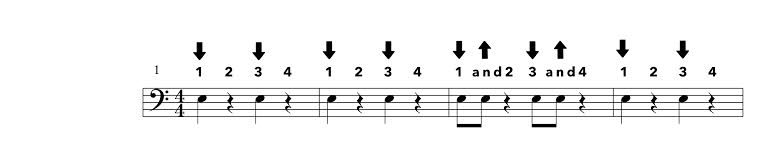
Here’s a few measures of music with ties and rests to help get you started. We’ve added in arrows and beat numbers to help you learn. Remember to rest completely when you see a rest symbol:
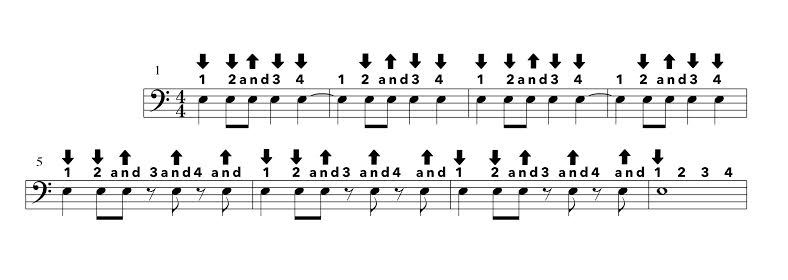
When you’re ready, move on to this tougher exercise:
Knowing exactly where the main beats of a measure are is more than half the battle in being able to read rhythms and understand strumming patterns. It’s a good idea to have a pencil out to mark exactly where the beats fall in songs with music notation.
Practice With a Metronome
Once you’ve got a pretty good idea how to read strumming patterns, start practicing by playing them along to the steady beat of a metronome. Metronomes are devices that play perfectly-even and consistent beats. All musicians have a sort of internal metronome, but no one is perfect and practicing alongside a real one will help you get tighter and smarter with your playing. Every music store sells a variety of metronomes, and you can download free metronome apps right to your smartphone.
Learning By Looking and Listening

Some strumming patterns look insanely intimidating on paper but sound catchy and easy to play. Sitting down to figure out the rhythmic notation of the song you want to learn is not always going to be the most efficient way to learn a piece of music. A good deal of your development as a guitar player should be by listening and watching the guitar players you want to sound like. Musical notation is an incredible way to understand music, but it only gives you a general idea of what something sounds like. If you want to learn how to read strumming patterns, immerse yourself in guitar music and imitate what you see and hear. Reading music notation is a great start, but you won’t begin to progress until you log hours and hours with your instrument.
Recommended Articles for You
 Open-String Guitar Chords: Introducing the CAGED Chords
 How To Read Guitar Tabs
 Rhythm Notation: Learning to Read Basic Rhythms
 Open-String Guitar Chords
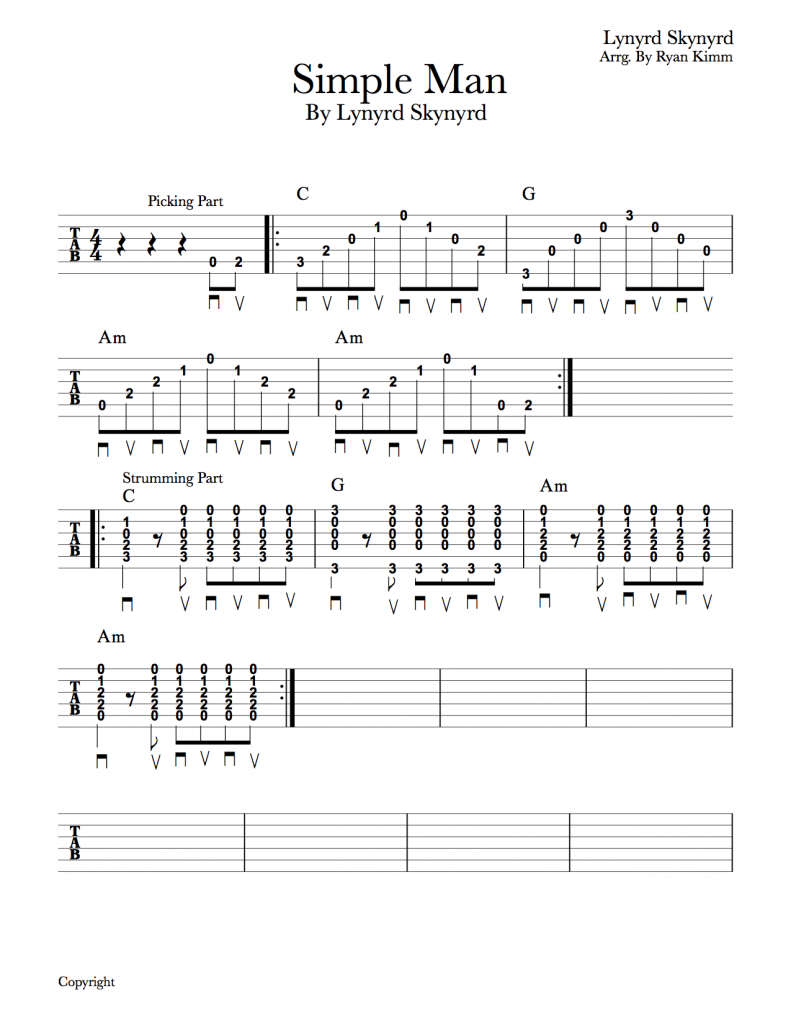 Easy beginner guitar songs: “Simple Man” by Lynyrd Skynyrd
 Guitar Exercises Every Guitarist Should Practice
 Reading Music for Beginners: Rhythm and The Staff